Friday, January 29, 2016

Sew-In on the Beach


 Every winter I meet a group of friends for a winter sew-in.  We are from several different parts of the country, so it usually involves some travel and new scenery.  The last two years we have met in Atlanta at Julie's house.  This year we met in Seagrove Beach, Florida.  Three of the group have condos there and we used the clubhouse for sewing.  It was a great facility, with lots of light and a good kitchen.  Here are some pictures of the sewing room.


     Here are some of the works in progress:
Here's Laura with her selection of solids.
And the finished block!  Yes, it was paper-pieced, intricately paper-pieced.


Laura also brought this beauty, which needed the binding hand-stitched.  We finished that for her during rest stops.

We had a newbie.  Evelyn had sewing experience, but no quilting in her past.  Sister, Janie, brought her a jelly roll and matching charm pack and introduced her to quilting.

And here is the finished product
I think we have a new quilter.


     Here's Julie and her projects:
Sashing a BOM.

And her Rattlesnake blocks.  You will see several versions of the Rattlesnake.  They were an Arrow Rock Quilt Camp project from last May.

Lola's Rattlesnakes
And on the design wall.


Janie's version of Rattlesnakes.  Amazing how different they all are, isn't it?
     Sandy finished this flimsy during the sew-in.  Several of us bought some of the same fabrics during our quilt shop visit in May.  We challenged ourselves to bring a quilt from them to quilt camp in May, but Sandy is winning this one.  

Teri brought some of her husband's ties, looking for ideas on a way to use them in a quilt.  Here is the finished product.  It will be appliquéd to a backing for a wallhanging.  
Beautiful, isn't it?

     I took several partial projects, mostly blocks cut into kits.  I had one finished flimsy to display.  This is a Rainbow Scrap Challenge project.  The January color was blue.  I had a ton of blue 2-1/2" strips, so did some rail fence blocks, then did some slicing and dicing.  


 Here are some more of my WIPs.
A pattern from Homestead Hearth, called Red Cross. 

I had fun sewing on Julie's Featherweight.

Some churn dash and basket blocks from another WIP.

As seen in Bruno's Pizza. 


Our farewell dinner at Salty Sue's.  
Did I have shrimp?  
Of course, I had shrimp!

I'm back home now.  I've quilted and bound that RSC quilt and will donate it to a local group helping families with small children.  They said they seldom have quilts for toddler boys, so I hope it goes to one of those little guys.  All of those other projects await me in the sewing room.  We have snow in the forecast for next week, so I will plan to 
Keep on Stitchin',
Judy


Tuesday, January 12, 2016

Quilting Season 2016

     Once the holidays are over, I am so impatient to get everything boxed up and stored away so that I can plan my sewing projects.  The first three months of the year are always my best sewing time.  There are fewer distractions, the weather isn't conducive to outdoor activity and our little village goes to sleep for three months.  Sometimes there is a little activity on the weekends, but not much.  Approximately 50% of our residents are weekend people and they tend to stay in the city most weekends, especially when it is cold or snowy.  So, I have plenty of time to sew and tend to burrow into my sewing room and come out only for sustenance and sleep.  Here's what I've been doing.

I finished my blue orange peel.  The appliqué was my deck-sitting project this past summer.  

The photos don't do it justice.  The blues are actually much brighter.

I used unbleached muslin for the backing.  I will have to admit, there is nothing that shows up your quilting as well as muslin.


I joined the Rainbow Scrap Challenge this year sponsored by So Scrappy.  The January color was blue.  I had a bursting-at-the-seams bag full of blue 2-1/2"strips, so chose this block, Father's Choice, to make for my year long project.  This will be twelve or so blocks with sashing (I think).  Then, since that didn't make a dent in that bag, I decided to try a new block using more of the strips. 

Someone had given me a gallon zip lock bag full of 1-1/2" white strips.  So I came up with this block, which I'm calling the Binbuster.   

I tried this setting...pretty boring.


Then I sliced a couple of the blocks on the diagonal, in opposite directions, sewed them to each other and lo! a block with a little more personality.  I think this will make a great charity quilt.


Someone in the Stashbusters group posted photos of three quilts done in Jacob's
 Ladder blocks, all using different settings.  So, in December, I pulled some Christmas fabrics from the stash and made this small table topper.  It is 45" square.  


Last, but not least, I have finished the flimsy for Allietare, the Bonnie Hunter 2015 mystery quilt.  I only made 1/4 of the blocks during the mystery,  due to the disappointment in my quilt last year.  Of course, I love this one and wish it was larger.  It is 56"x56".  


I have some other things started, so will share those another day.  For now, 
Happy New Year
and

Keep on stitchin'
Judy


Tuesday, November 24, 2015

2015 BKH Mystery

     Chime in if you are doing the 2015 mystery quilt designed by Bonnie Hunter! 

I thought about not doing it, but have been caught up in the hype on the Quiltville group.  My friend Gina, calls this FOMO (fear of missing out).  Sadly, that is the case.  I burrowed into the stash, looking for Bonnie's colors.  They are closer to my palette this year, so I won't be changing them.  I have plenty of everything for a small sample, except for the gold.  All my golds are too brown, I think.  I found two or three to start, though.  I'll see if I like the design before I invest in any more.  I am currently in love with grey, so that was not a problem.  I am looking forward to using it in this quilt.  

Here's what I'm thinking.  Any suggestions? I didn't make it to Lowes for paint samples, but someone online worked out the DMC colors, so I used those.  This should be fun, although I don't need another UFO.  I still have two Bonnie projects left from our guild's workshops with her in September.  Familiar refrain?  
     I have finished a couple of other projects, though.  Just to the flimsy stage, but that's almost done for me.  My hand stitching project for summer evenings on the deck was a blue and white orange peel.  I have been wanting to make a blue and white quilt for sometime so decided on this pattern after watching a Jenny Doan tutorial on her version of the orange peel, which is machine appliqué.  I wanted to do needle turn appliqué, but I did like the colors she used.  Here's my version, although the blues didn't photo very well.  They are brighter than they appear in the picture.

It isn't very big, just about right to drape over a cupboard door or the sofa.  

     I'm also working on the Mystery Quilt for Arrow Rock Quilt Camp in May.  It's time to put the fabric requirements on the website.  This is a totally different color palette for me, but I need a graduation quilt for a young lady in May and I had her in mind when I chose the fabrics.  This is a layer cake by Bonnie and Camille called Hello Darling.  It's very bright and cheerful on my design wall right now.


I'm going to close this post with a little color inspiration for you.  This is a picture from the state park that adjoins our little town.  How about these colors for a quilt?
Have a great Thanksgiving! 
Judy


Saturday, October 17, 2015

Back in the groove.

     I know its been awhile, but cooler weather always makes me dream about quilts, so will share what's been going on in my life.  Vacationing in Ireland took much of my August, so not much accomplished.  It is a beautiful trip which I would recommend to anyone.
I saw lots of quilt inspiration.


And beautiful scenery.

     As soon as I returned, it was time to gear up for our guild's Bonnie Hunter event.  We started planning two years ago for her to visit and do a trunk show and two workshops.  It was a big success with visitors from several states, but I'm glad it is behind us.  We immediately rolled into the planning for our annual quilt show, which took place three weeks after the Bonnie Hunter event.  It was last weekend, so I'm beginning to finally feel like my life is my own.  Here are a few pictures from the quilt show.


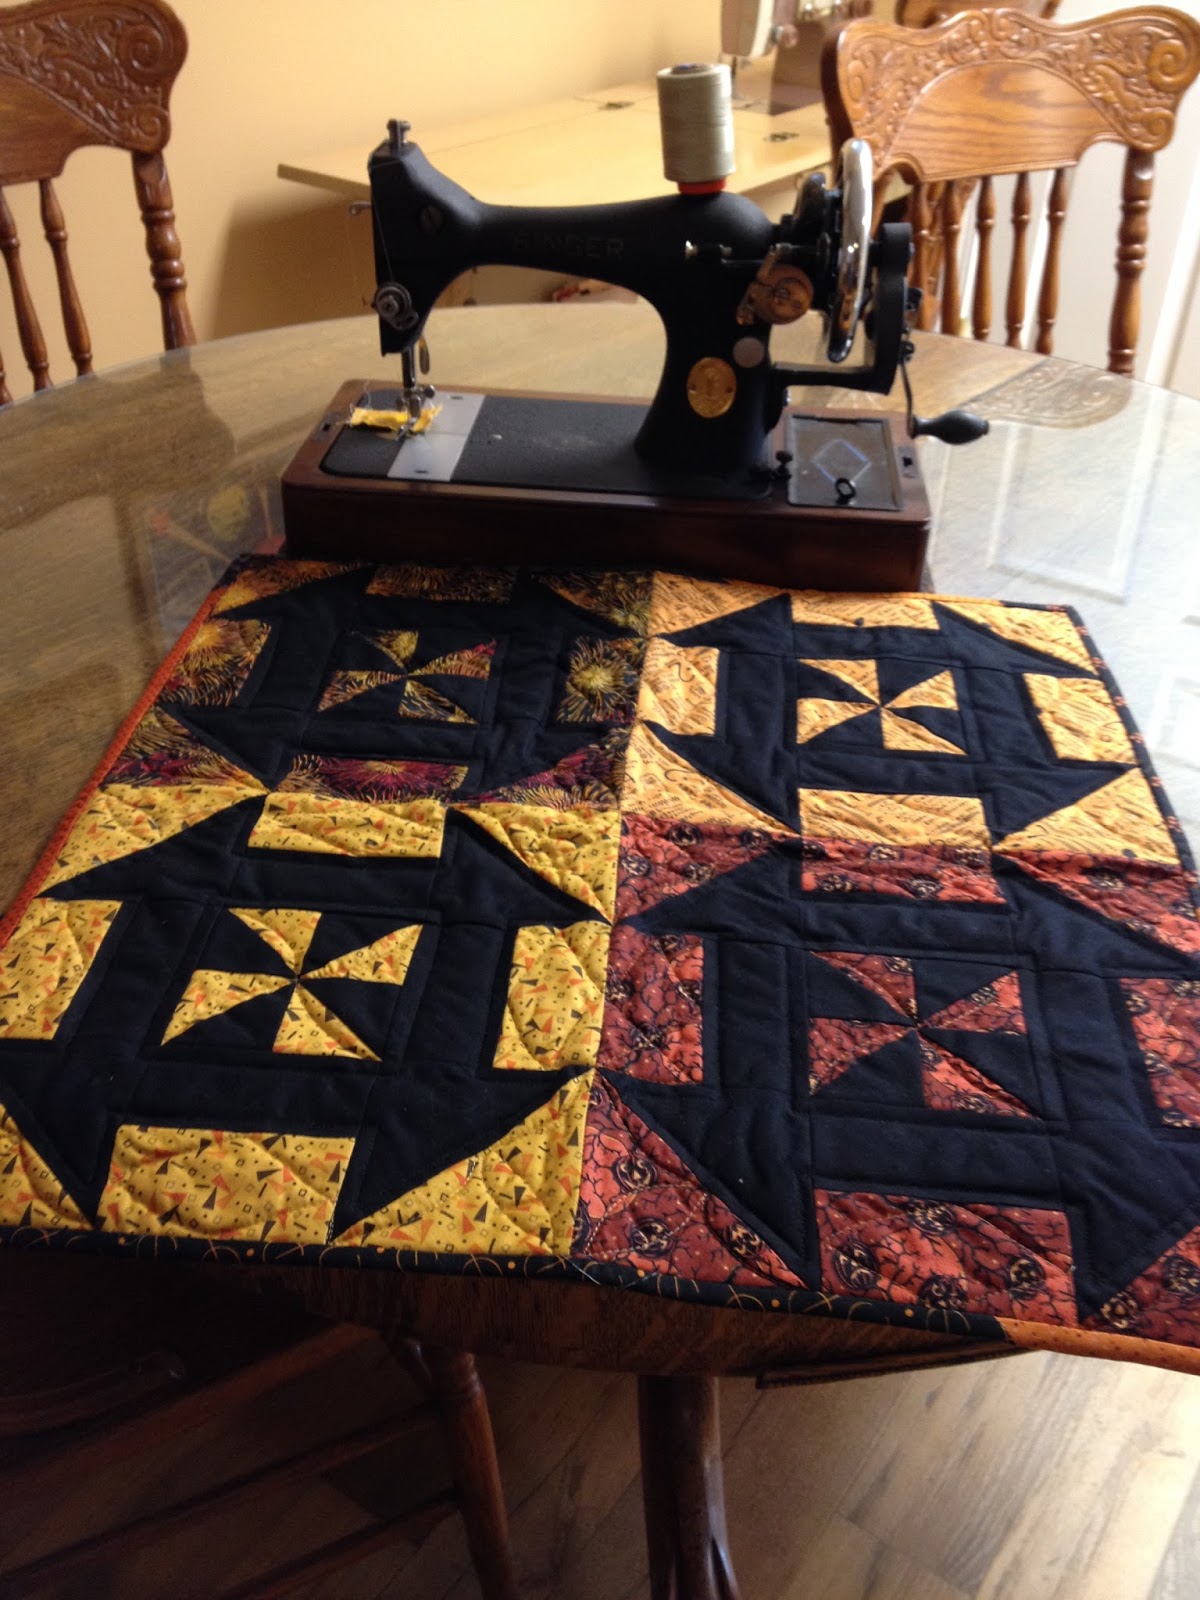
     I always get the urge to sew Halloween projects this time of year and this year was no exception. 


     I'd also been wanting to try these Missouri Star/Jenny Doan patterns.  The Disappearing Pin Wheel blocks that make Shoo Fly and Churn Dash blocks.  They are certainly quick and you can make a large quilt in a short amount of time, but they do have some drawbacks.  There are lots of bias edges, for one.  I used Best Press, which helped, but when quilting them, they still wanted to pucker under the needle.  The other drawback is they are not a standard size, so you can't mix them with other blocks.  I thought I would make some hourglass blocks to use as alternates, but they weren't the same size.  So, if you haven't tried them, just be aware.  They are not your Mother's quilt blocks.  
     
Here's my other experiment.  I bought a ruler for free motion quilting at a recent quilt show and tried it out on some of my Halloween table runners.  I think it is something I will use often, once I get a little more practice.  

See my nice straight line along the seam line?  


     Here is a project that has been languishing in my UFO bin for about six years.  It was a block of the month mystery quilt from Jan Patek.  I only did part of them because I didn't like the construction method and was having shipping problems.  I had two more appliqué blocks to finish, then find a way to arrange them into something resembling a quilt.  I placed it on my UFO challenge list for the year, but had been avoiding it for several months.  I did finish the appliqué eventually, although I changed the construction method to paper piecing, which was much easier.
Then it was time to try to put it together.  All of the blocks were different sizes, so first I had to come up with a common denominator, so they would fit together.  The only thing that worked was two, so all blocks were trimmed or built out to a measurement divisible by two.  

Then, I made graph paper mock ups of each block and started arranging them on a large piece of graph paper, with each square counting as two inches.  After about two evenings of craziness, I had a plan.  Now to construct the filler blocks.  I did some four patches, square in a square, and log cabins, depending on the size of space I had to fill.

Here are some of the sq/n/sq blocks in the upper left.

    It is finally together and is a big relief.  I think it needs a tone on tone border to tame it down a little, but the biggest part is done.
     I hope you are enjoying this autumn weather as much as I am.  Get outside as often as you can, but keep on stitchin'...
Judy


Sunday, July 26, 2015

A Scrappy Finish!

    Once upon a time, on this blog, I wrote about a scrap quilt I was starting as a leader/ender project.  For a time, it even became a primary project because those little blocks were so much fun.  I'm happy to report that all of those cute little blocks are now a gorgeous big quilt.  Because they were so much fun, I  couldn't stop at 100 or 150, but just kept going.  At 175, I finally thought "enough already" and stopped to decide how big a quilt I wanted.  The setting I wanted needed 196 blocks to complete the design, so that was my goal.  For some reason, that last set of 10 blocks took forever.  I think I was dragging my feet because I knew the laying out of the blocks was going to take a very big space, bigger than my design wall, and a lot of time.
     Our guild sews together in a church basement on a monthly basis, so I took those 200 blocks with me last week and laid them out with the help of some of my quilty friends.  I won't go into much detail about the trials and tribulations suffered while sewing the blocks together.  I will only say it required some unstitching and restitching and took most of the week.

    After some trial and error, mostly error, I decided it could be managed better in fourths.  Here is 1/4 of it webbed on the ironing board.  I am pressing seams in preparation for putting the rows together.  
Quality control committee of one.

Ta Da!
Not the best picture, but the only place I could find to lay it flat.  When I get it quilted, I will get a picture on the clothesline or commandeer some family to hold it for me.  

Here is the center.
     Just for curiosity's sake, I ran some calculations on the numbers involved in making this.
Size - 90" X 90", 196 blocks, set 14 blocks across and 14 down, with a 2-1/2" border, just to control the stretching on the edges.  
# of pieces - 2352
# of seams to match, joining the blocks into rows - 54 per row
# of seams to match to join the rows - 648
Total # of seams to match after blocks are made - 1404
Speaking of matching seams, they are not all perfect.  My mother used to say that if you couldn't see it from a galloping horse, it was ok.  That's my story and I'm sticking to it.  

     My granddaughters visited this week and we finished piecing Amy's quilt with the help of big sister, Olivia.  It started as a rail fence design and we set it together using the sashing technique I taught at Quilt Camp last spring.  So easy and it really makes a great quilt.  Here it is with two proud girls and their Nana.  
     There won't be much stitching this week, as our peach trees are almost ready to harvest and I will be elbow deep in peaches.  
Aren't they beautiful?  Wouldn't those colors make a pretty quilt?

Hope you get some stitching done this week.
Judy